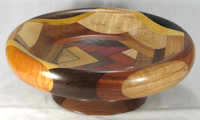
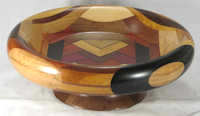
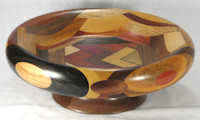
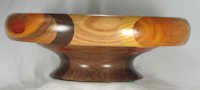
exotic wood segmented / laminated wood
BOWLS
FOR
SALE
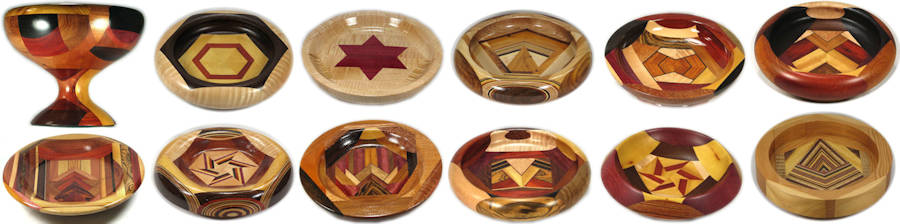
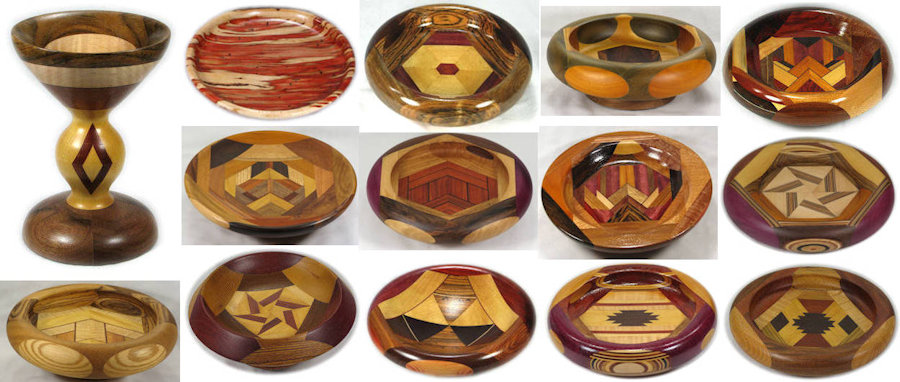
CLICK HERE FOR BOWL DESCRIPTIONS AND PICTURES
this page lists the purchasing conditions of the bowls, discusses the fabrication process
and various aspects of the bowls, describes how the pictures are oriented, and
gives some definitions of terms used in describing the bowls.
ordering
email address
bowl numbers
a note about the woods used
views used in locating the woods as described
making the bowls, or "how do you DO that?"
finishing
a note about mixing woods of different characteristics
flaws and issues
pricing
payment
discounts
packing
shipping
GLOSSARY OF TERMS
CLICK HERE FOR BOWL DESCRIPTIONS AND PICTURES
Ordering:
I do not have a "checkout" process on this web site, nor do I have an order form. Just tell me via email what bowl(s) you want and give me your address so I can figure shipping charges, and I'll add $5.00 per bowl for packing and give you a total, which you can then pay by personal check, money order, or via paypal. I cannot process credit cards, although you can use a credit card to pay via paypal. I give a 10% discount if you buy 3 or more bowls at the same time.
EMAIL ADDRESS:
I apologize for not having a clickable email address, but ebots suck them out and then I get tons of spam for viagra and since viagra would just cause me to spend time doing things other than making bowls, I'd rather avoid it, SO ... my email address is:

bowl numbers:
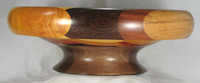
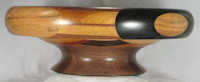
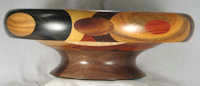
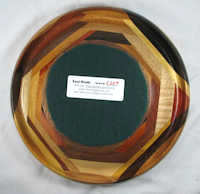
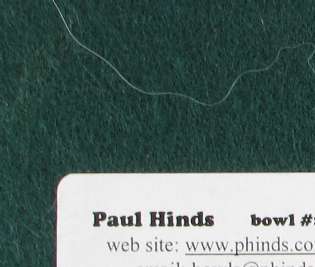
I have put an orientation picture at the top of the page for each bowl, followed by my comments about the woods used in the bowl, and there will be a label on the bottom of each bowl with the bowl number written on it, like this one for bowl #N14.
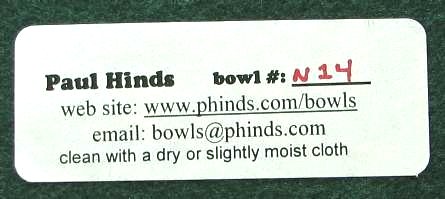 These labels are applied to the felt bottom and can be peeled off if you wish.
a note about the woods used:
I maintain a web site for information about exotic wood, and to obtain woods for that site, I buy a large variety of wood from many different sources, sometimes even mixed lots that contain some woods I cannot identify. Even for the woods for which I know the identities (or perhaps I should say for which I ONCE KNEW the identities), once they have been photographed for the web site and then cut into sections for use in the bowls I often neglect to note what woods go into a particular bowl, and once the only thing that shows is a small section of wood in a bowl, it can be difficult-to-impossible to identify the wood. SO ... it is quite possible that the identification of woods in a particular bowl will be incomplete.
In terms of how I list the woods, my notes may well seem cryptic, but I do attempt to maintain some consistency and the general technique is something like this:
There is an "orientation" picture of each bowl at the top of the individual page for that bowl and all positioning is based on the orientation of the bowl as it is shown in that image. "Views" are explained in the section below on "Views used in locating the woods as described". Positions of woods being described are given relative to the views and the views are positioned relative to the orientation view.
Other designations, aside from the view specified, are:
"sided" mean that a wood occurs on both sides of something already described, so "walnut sided by red oak" for example, means there is walnut with red oak on both sides of it.
In the absence of any other specifics along with a list of woods, the woods are listed either from the top of the view downwards or from the edge of the bowl inwards or from left to right in the view.
"veneer" refers to the "normal" veneer thickness of about 1/42nd of an inch, which appears in the bowls as a thin line.
"thick veneer" refers to veneer that is about 1/16th of an inch thick, which appears in the bowls as a thick line.
"thins" refers to wood about 1/8th inch thick.
All other thicknesses are pretty random and are not generally mentioned.
BOX refers to a square or rectangular section in the middle of a bowl that may be difficult to describe using the views and so is described on its own, all relative to view 1.
A LOT of additional information about the woods used in the bowls can be found at my exotic wood site:
Hobbit House Exotic Wood Site
For some common species, the designation used, unless specifically stated otherwise, means the following:
ash = American white ash
oak = American red oak
walnut = American black walnut
cherry = American black cherry
ebony = Gaboon ebony
mahogany = Honduras mahogany
views used in locating the woods as described (IN OLDER BOWLS --- see below for newer display method)
If geometry makes your head hurt, you might want to skip this section (but do remember that if you buy one of my older bowls and want to figure out what a particular wood is, you'll have to use this section to decipher my notes on the positions of the various woods used in a given bowl).
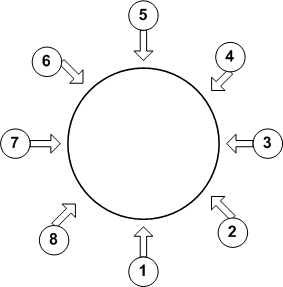
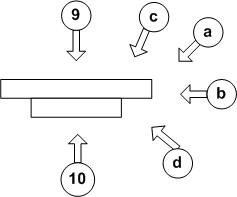
I want to consistently relate the bowls to the pictures I take and thus to provide consistency, and I hope clarity, on WHERE to find the woods described. To do this, I describe the wood placement using positions that are numbered based on the image as shown in the left-hand of the two drawings directly below, which is looking straight down onto the bowl. I add to this some side directions as shown in the right-hand drawing. Putting the two together gives a number followed by a letter and this can be interpreted to give a 3D description of the view. The number gives two dimensions and the letter gives the third.
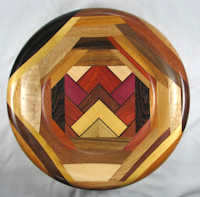
The view from "overhead" (the view of the left-hand drawing below) is view number 9. This is shown in the right-hand drawing along with the view from the bottom (that is, with the bowl upside down) which is view number 10. The standard "orientation" view is view #9. Seen directly from the edge, the view is "b" and from the bottom at an angle it's "d" (that is, with the bowl upside down as in 10, but viewed at an angle.
The angled upper views are "a" and "c". I normally do an "a" view for positions "1", "3", "5", and "7" but may also do "2", "4", "6", and "8". I do a "c" view for just "1" (and occasionally "5").
If you were to hold the bowl out from your body at stomach level in the orientation position, you would be looking at view 1c. View 1a is the same as 1c but with the bowl at about neck level so that you have a shallow view into the center of the bowl. If you do the 1c position but turn the bowl upside down so the bottom faces the ceiling, you have the 1d position. In this position, the lable I put on the green felt bottom is facing you.
Ocassionally I take pics outside this normal range --- especially closeups. These still use the "1" to "8" position designation but then are given letter designations from "e" and up.
SAMPLES OF SOME OF THE VIEWS

views 1c, 3c, 5c, 7c

views 1a, 3a, 5a, 7a
views 1b, 3b, 5b, 7b
views 9, 10, 1d, 5d
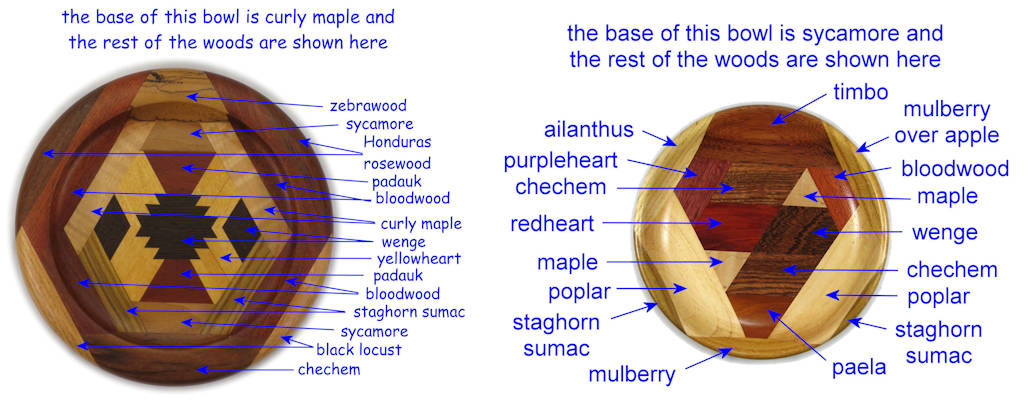
views used in locating the woods as described (NEWER BOWLS)
More recently done bowls (and now some of the older ones as well) have the woods identified directly on the bowl's page so none of the mess described above is necessary for them.
Here are examples of what the newer bowl pages include (and as I make time for it, I am going back and doing some of the older bowls this way as well):
making the bowls, or "how do you DO that?":
The time spent on these bowls, when you add in ALL of the activity that I perform that I would not do at all if I were not making the bowls, ranges from 5 or 6 hours for the smallest ones to 10 to 15 hours for the larger ones, broken down something like this:
1) time spent going to lumber yards, buying wood on the internet, etc, getting the wood, unpacking it and cutting it up for the bowl use prorates out to about 1/2 hour per bowl. This does NOT count the activities around cutting up, fine-sanding, and photographing the wood for my wood web site, none of which activities have anything to do with bowl making.
2) The bowls are built up using a process something like this: take two pieces of wood and sand one surface of each. Glue them together on the sanded faces. Cut one face off of the result and sand that. Take another piece of wood and sand one face of it and glue it to the other two. Repeat this process almost forever. This is where the bulk of the time is in making the bowls. Some of the bowls have many dozens of pieces of wood, including paper-thin pieces of veneer and every joint has to be glued and then one edge of the growing blank has to be cut and sanded and then another piece glued to that, and the whole process repeated over and over and over until the blank is the size of a bowl. Sometimes I build up small sets of woods in a section and then glue a couple of such sections together, but even when done that way, every joint other than the veneers has to be sanded and every joint including the veneers has to be glued. I buy wood glue in gallon containers and 6"x48" power-sander belts in boxes of 10.
3) In between all the cutting and sanding and gluing, the selection of wood pieces and some thought about how I want the blank to grow takes a fair amount of time. I sit surrounded by boxes of exotic wood and a partial blank in hand and think about what wood I want to add next. I pick up various pieces and hold them up against the blank-in-progress. Sometimes I base the decision on color, sometimes on grain, sometimes on shape or size, and so forth. Some care goes into making sure that the woods are added on in a way that avoids having any of them turn cross-grain, which can cause tearout and other turning difficulties. Sometimes I forget and/or get optimistic and allow a piece to go cross-grain or partially cross-grain and I'm usually lucky when this gets on the lathe but ocassionally there will be small chip-outs at the edges of cross grain pieces, which occasions some additional sanding and numerous loud expressions of words that you probably would not encourage your children to use. The selection process averages a couple of minutes per joint and since most bowls have many dozens of joints, that adds up to a lot of time.
It can take many months or even a year to build up a full bowl blank. At any give time, I generally have a few dozen blanks in progress.
4) Once the blank is fully built up to the size of a bowl, I attach a base (which ALSO takes time to make). The bases for the low "candy dish" bowls are general simple and made of the same wood throughout (red aromatic cedar, walnut, and mahogany are the normal choices because they turn very nicely and look great). These are glued up in a way that avoids any part of them having to turn cross-grain, which can cause tear-out. For goblet-shaped bowls, the "bases" can be fairly complex and the process for making them is exactly the same as the process for making the upper parts and can be equally time consuming.
5) The actual time on the lathe is only 1 to 2 hours (on rare occasions a bit more) depending on the size of the bowl, the degree of care which, for numerous reasons, may be required in the turning (soft woods next to hard woods, end grain pointing into the turn, etc.), and the amount of on-lathe sanding that is required.
6) Once a bowl is complete and fresh off the lathe I coat it with natural stain to protect against moisture absorption and finger oils. The natural stain deepens and enriches the wood colors.
7) I then apply further chemical finishing agent(s), generally some form of polyurethane, or shellac, or enamel (or some combination of these). This requires several coats and some buffing/sanding in between coats. This all about 20 to 30 minutes per bowl counting all of the coats and sanding/buffing but can take longer if the finish doesn't turn out well and has to be reworked.
8) I attach a felt bottom and a label and then take 20 or so pictures ("finished"), some of which are what end up on the bowl's web page. Some of the earlier bowls have the final pic taken BEFORE the label is put on but if you don't see it in on the felt in the bottom view, it will still be there when you get the bowl.
9) I organize and manipulate the pictures (cropping, correcting the colors, etc) to put up on the web site. I have had as many as 100 pictures of a single bowl although more typically these days it's about 50. The combination of taking and manipulating the large number of pictures averages about an hour per bowl. LATER: the number of pics per bowl is considerably less on newer bowls.
10) The last step is typing up notes about the bowl --- what woods are used (to the best of my ability to recollect and/or figure it out), what flaws or issues exist if any, the dimensions, and any other comments I have. The creation of the notes plus the creation of the web page for a bowl can easily add up to another hour or more.
There are other, somewhat incidental, activities that are required as well (cleaning up the messes I make, etc.) that may be incidental to the bowls, but DO require time that would not be needed if I did not make the bowls.
So, again, it takes 5 to 15 hours per bowl, with VERY few down in the 5 hour range, most in the 10 or so hour range, and a few up to 15 or so. I was shocked when I first did that calculation. These bowls are clearly non-trivial to make, but even so, an average of 10 hours seems like a LOT. Still ... that's what it is, and of course, there's the cost of materials, which runs about $15 per bowl average, so while the cost has to seem high for what amounts to just a chunk of wood, it doesn't represent much in terms of dollars per hour of labor.
finishing:
After a bowl is turned, but still on the lathe, I lathe-sand it, starting with 40-grit (which I may apply lightly or even not at all if there are no rough cross-grain areas to sand down), then 120- or 150-grit, then either 240-grit garnet paper or a special 320-grit open-grid drywall sandpaper. This creates a very smooth surface but I then "burnish" the surface by pressing a handful of shavings against the surface while it turns at high speed. This REALLY makes it glass-like. I used to use a 600-grit final sanding before the burnishing but I dropped that step because I found that once the polyurethane was applied it was no longer possible to tell, either by sight or by feel, whether or not the 600-grit had been used.
After taking a set of pictures of the bowl in that state ("raw"), I apply a coat of natural stain to block moisture absorption and protect a little against skin oil as I handle it. I then take another set of pictures ("natural stain") and then, over time, apply two or more coats of polyurethane. Early bowls were done using regular poly, but I have switched to spar poly, which has a UV blocker. This is helpful to keep some of the woods (such as aromatic red cedar and redheart) from fading and others (such as padauk) from changing color (red to brown in the case of padauk). LATER: I now like flat finishes and often will use clear flat enamel (several coats) as the final finish to take the shine off.
I do NOT use any "filler", so woods that have a very open pore structure such as padauk, which I use a lot of because of its beautiful red color, (but also oak, ash, and some others) will continue to show that open pore structure after the application of several coats of polyurethane. In fact, in some cases, the open pore structure is emphasized by the polyurethane. Thus the glass-like surface just off the lathe actually looks just a little dented in some cases in the final product, since the pores suck up the poly and cause small indentations in the finished surface. Some woodworkers like to use a filler to avoid this and to achieve a solid glass-like finish, but I prefer to leave it as it because I feel that retaining some of the surface character of the woods adds overall character to the end product.
In between applications of finish, I buff/sand as needed. The finishes are applied with great care, in very thin coats, to avoid air bubbles but occasionally an air bubble will happen anyway due to air from inside the grain of the bowl. These are tiny but noticeable both to sight and to touch and they need to be buffed out after each coat dries.
When the chemical finishing is done, I put on a green felt bottom. I used to just do poly on the bottoms because I hate to cover up any area of wood, but the bowls would slide around much too easily on smooth surfaces so I now add the felt bottom.
The piece is now finished and I take another set of pictures ("finished") and then apply a label on the bottom (illustrated further up this page), showing the bowl number (so you can look up the pics on this web site if you ever want to) and reminding you to only clean it with a dry, or just slightly moist, cloth. On all recent bowls and going forward, I apply the label BEFORE I take the final set of pics. The label is always applied so that if you hold the bowl away from you with the bottom facing the ceiling and the label "facing" you (that is, in a directly readable orientation), you are looking at view 1d and if you then invert the bowl so the label points at the floor, you are looking at view 1a (or 1c depending on how far below eye-level you're holding the bowl. If you the move the bowl to your belly and look directly down into it, you are looking at view 9 (the "orientation" view).
a note about mixing woods of different characteristics.
There are two characteristics of wood that are particularly relevant when mixing woods of different species in the same project. These are hardness and "movement in service".
Many craftsmen argue that one should not combine woods of radically different hardnesses in the same project and particularly not in the same area of a project. This is because it seriously complicates sanding operations, as a given amount of pressure can cause heavy sanding in a really soft wood and have absolutely no effect at all on a really hard wood and so sanding a mixed-wood area can be a real problem.
"Movement in service" means the amount of size change (expansion and contraction) a given species of wood exhibits when it gains and loses moisture as the air around it gains and loses moisture during the seasons of the year. Woods that have radically different movement in service, if glued next to each other, can develop stress fractures because one wood changes shape much more than the other. There is a longer discussion of this at the very bottom of this page, and an illustration of an extreme example of the problems it can cause.
Although I recognize full well the problems inherent in using mixed woods, as explain above, I mix woods anyway because I want my selection process to be based primarily on how the wood LOOKS (that is, color and grain), not on its technical characteristics. I get away with this pretty well because the sections of wood in the bowls are so small that stress fractures are rare. On rare occasions, I am able to feel a slight change in the surface of a bowl that has a hard wood next to a soft wood, but this is while it's on the lathe and moving rapidly from one section to another. With the bowl off the lathe, these changes are not noticible. In any case, I am careful to point out any flaws that you will see or feel, because I don't want you to have any unpleasant surprizes.
flaws / issues
If there is an obvious "flaw" such as a crack in a wood knot, and it shows up VERY clearly in the normal pics, I may well not point it out as I consider it simply a part of the character of the piece and not requiring further comment. Sometimes, however, a piece of wood will have an internal flaw such as a small crack or gum inclusion or wormhole that doesn't show up until the wood is turned to that point, and that is a "flaw". Also, sometimes small sections of wood that are turned against the grain will crack off right at the edge, leaving a small but noticeable flaw in the surface. Further, the blanks sometimes develop hairline separations between pieces of wood or even within a piece of wood due to differences in "movement in service" of adjacent woods, and this too is a flaw.
I always try to remember to point out any such issues, as I do not want you to be surprized or disappointed in what you get.
Here are samples of these issues:
On the left is open pore padauk and in the middle is open pore oak, both of which show indentations in the surface of the polyurethane. To the right is osage orange exhibiting a cracked knot.
A gum inclusion in yew. This didn't show up until it was turned, but it's common for yew so did not come as a shock to me. Although it is quite common in yew, it also happens in other woods and shows up occasionally in the bowls. It is somewhat "character" as opposed to a flaw, but some people consider it a flaw, so I list it as such.
In the middle is a small edge crack that occurred in a tiny wedge of walnut due to cross-grain turning. This image is about twice as large as actual size, so as you can see, the flaw is small --- but it IS noticeable.
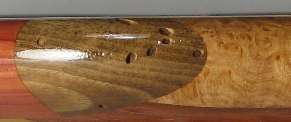
A Wormy wood (I've lost track of what kind this is). I knew the wood was wormy when I put in on the blank (the holes were visible), and I consider this character, not a flaw, but it's the kind of thing I always point out so there won't be any surprises.
Also, see the discussion at the bottom of this page on movement in service.
pricing:
I do these bowls because I enjoy doing them, but it takes a LOT of time to do one (see the discussion under "Making the bowls") and the amount of money I charge for them usually amounts to little more than minimum wage for my time. I point this out because in one way I would prefer to charge less (they ARE just chunks of wood, after all, and I have so much fun making them that it seems unfair to charge money for them) and in some ways I would prefer to charge a lot more (because of the time they take me) --- I have compromised on at the prices as stated here.
Prices are based on secondary considerations such as how many pieces of wood (and therefore roughtly how much time) went into making a bowl, the size of the bowl (again because of the time factor), and the cost of the specific woods used, but mostly the price is based on the primary consideration of how much I like it. I have long given up trying to divine other people's tastes. I have had what I consider to be one of my ugliest bowls praised as my most beautiful and one that I just loved condemned as gaudy. SO ... I do these for myself and when I think one didn't turn out too great, I price it lower and when I think it turned out well, I price it higher. If your taste runs contrary to mine, you'll love my pricing and if runs parallel to mine you'll like the bowls and dislike the prices.
NOTE: Now that this site has been up for a while, a few of the wood-turners who use my exotic wood site have checked it out and they tell me I am DEFINITELY pricing the bowls too low given the obvious amount of work involved. Yeah, I knew that. :-)
payment can be made by paypal to the following paypal address:

or you can send a check or money order to:
Paul Hinds
41 W. Court St.
Cortland, NY 13045
I cannot process credit cards
Please do not forget that I charge $5.00 per bowl for packing and that I charge actual cost for shipping. Contact me at that email address and give me your zip code to get a quote including actual shipping cost. I will ship by Flat Rate box ($8.10 to anywhere in the USA) if it will save money (and assuming it will hold the bowl(s) you purchase).
discounts
The fact that you buy more than one bowl does nothing at all to change the amount of time it took me to make them, so I'm not crazy about giving a volume discount, HOWEVER ... when I buy stuff in volumn I like to get some discount, so I offer a 10% discount on the cost of the bowls if you buy 3 or more bowls, and of course you'll save a little on shipping costs per bowl because I'll combine them into one box, if possible (the packing I put around them takes up a LOT of room) and the cost of shipping 3 of them is less than 3 times the cost of shipping one of them.
packing:
Bowls are carefully packed in bubble wrap and box-filler material to avoid shipping damage and I charge $5.00 per bowl whether combined with other bowls for shipping or not.
shipping:
I will charge you for the actual cost of the shipping, which will be by USPS Priority Mail (2-day delivery). I do not use UPS or FedEX or Parcel Post or any other delivery mechanism than USPS Priority Mail. I will combine (as much as possible) if you buy more than one bowl at a time. As stated with packing, there is a $5.00 per bowl charge even if they are combined for shipping.
GLOSSARY OF TERMS:
For those not familiar with wood terms, here are a few that are used in describing the bowl woods:
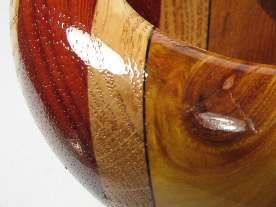
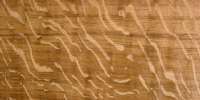
Chatoyance: the property whereby something reflects light quite differently depending on the viewing angle. With wood, this can be really striking, especially in pieces with ray flakes, which can go from dark to light as you move the wood's angle in the light. On wood with large ray flakes, the flakes themselves can change color in an obvious and attractive fashion, but where chatoyance really applies is in woods with multitudinous small ray flakes that cause the entire surface of the wood to change as you move it in the light. It gives the wood a "shimmer" that just can't be captured by still photographs. There are other wood grain characteristics that can create chatoyance besides ray flakes. It can be particularly striking in woods that have "interlocked grain" that creates a "mottle" figure and it can also show up in woods with a "curly" figure. Going into the details of interlocking and mottle and the reasons for curl seems far afield from bowls so I'm not going to get into those details. The point is that wood can have chatoyance for quite a few different reasons and it can be wonderful to behold. Having said that it can't be captured by a still photograph, I will now produce a still photography which does not demonstrate chatoyance but which is of a piece of wood that DOES show beautiful chatoyance. This is a section of bowl #S3 after the polyurethane was applied. The wood is sipo and the chatoyance in this case is due to multitudinous small ray flakes.
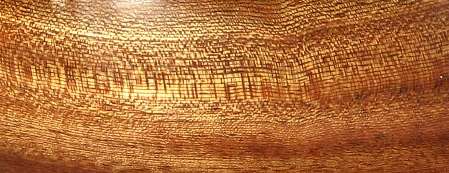
sipo (with a polyurethane finish) showing multitudinous small ray flakes that create a very strong chatoyancy
Dog Hairs: This has nothing to do with woodworking but is a hazard of sharing a house with a large shaggy dog (135 lb. Great Pyrenees) who sheds like crazy. If you find white dog hair packed along with your bowl, there is no extra charge.
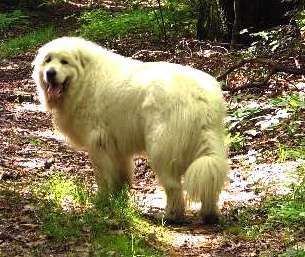
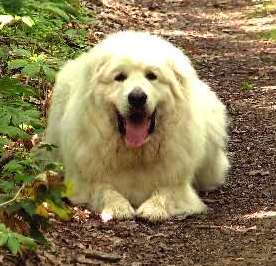
This is the beast
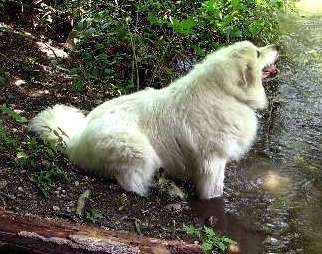
This is the result
LATER: sadly, Loki has passed on so it's no longer likely you'll get dog hairs for free.
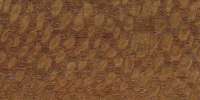
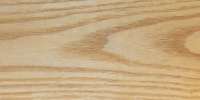
Ray flakes (aka flecks): oval or very elongated ovalish streaks, or sometimes just long streaks, in wood that are caused when the wood is cut on a plane that passes through the heart (the pith) of the tree and thus causes the rays (that is, in those woods that HAVE rays), which radiate outward from the pith, to lie flat along the surface of the wood. Wood cut in this fashion is called "quartersawn". Some woods, such as lacewood and oak, develop very large flakes and sometimes these can be quite long and more "stringy" than oval. Some woods, such as mahogany, develop only small, but multitudinous, flakes that can cause the whole surface to change color dramatically when you move it in the light (see chatoyance). Most woods do not HAVE ray flakes at all. Here are long ray flakes in English brown oak, medium oval ray flakes in lacewood and multitudinous small ray flakes in mahogany:
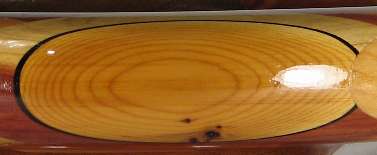
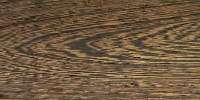
Flat cut (aka "plain sawn"): wood that is cut on a plane that does NOT pass through the heart (the pith) of the tree, and that has a grain pattern that can look like a series of nested "v"s or "U"s. Most wood is more attractive when flat cut than when quartersawn. Wood that is cut on a curve, as is frequently the case around the outsides of the bowls, can exhibit characteristics of both plain sawing and quartersawing in the same piece. Here are flat cut pieces of sen and wenge with what is sometimes called "cathedral" grain pattern:
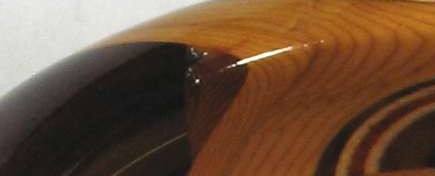
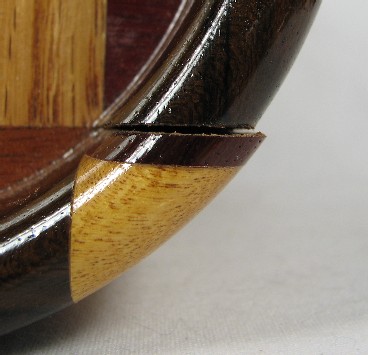
Omega Curve: This has nothing to do with woodworking, but I use it a lot to describe the curves that frequently occur on the inside of the bowl rims --- because of the way the wood is glued up and then the way it is cut on the lathe, the result is a curve that looks exactly like the Greek letter omega. Here are a few examples:
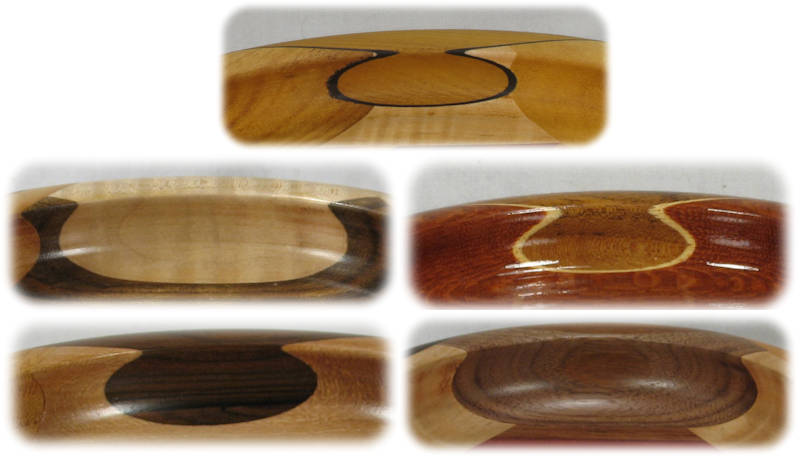
some nice omega curves

nested omega curves (one inside the other)
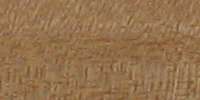
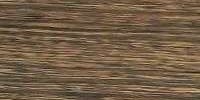
Quartersawn: wood that is cut on a plane that passes through the heart (the pith) of the tree and which has a grain pattern that looks like a series of parallel lines. When ray flakes are present, quartersawn wood can be quite striking, but without ray flakes, quartersawn wood is, paradoxically, much more plain than "plain sawn" (flat cut) wood. Wood that is cut on a curve, as is frequently the case around the outsides of the bowls, can exhibit characteristics of both plain sawing and quartersawing in the same piece. Here are quartersawn pieces of sen and wenge:

Movement In Service / Stress Separations: Wood is a porous, fibrous, material and when the air around it is very humid, it absorbs some of the moisture in the air, and when the air around it dries, the some of the moisture in the wood evaporates back out into the air around it. When the wood absorbs moisture, it expands slightly and when moisture leaves the wood, the wood contracts slightly. Different woods absorb and retain moisture to different amounts and so they "move" (expand and contract) by different amounts. This is the so-called "movement in service". When woods with significantly different levels of movement in service are glued next to each other with their grains running in the same direction, separations and/or cracks can develop due to the differing degrees of size change in the different woods. These stress fractures do occur occasionally in my bowls because I choose wood based on color and grain, not on movement in service. I always point them out in the descriptions so you won't be surprised when you get a bowl that has one. If a severe separation occurs, the bowl blank becomes a useful addition to the fire in my next back yard barbecue. All that is mostly a problem with my older bowls and hasn't happened with bowls made since the beginning of 2018 because because of improved construction techniques.
MUCH more significant are the separations and/or cracks that occur with cross-grain gluing of woods even if they have the SAME movement in service. To best understand this, think of a long string that gets wet. The length of the string will increase a little but not really all that much relative to the total length of the string. The FATNESS of the string, however, will increase quite a bit relative to the fatness prior to its getting wet. It would be quite reasonable for the length to increase by 3 percent and the diameter to increase by 10 percent. Wood is basically made up of bundles of string ("fiber" to be technically correct) and so it exhibits this difference in size change in that the change of size along the length (with the grain) is small compared to the change in size across the piece (against the grain). So if you were to take two identical-sized squares of wood and glue them with their grains perpendicular to each other, the movement in service of the "with the grain" edge would be small compared to that of the "across the grain" edge glued to it. This is true even if the woods have the same movement in service, because woods actually have TWO measures of such movement: one with the grain and one across the grain. This effect sometimes causes my bowls to develop small separations between sections of wood. In my early days of making laminated bowls, I didn't realize how dramatic this can be and I made some bowls that have since developed very large and extremely obvious separations and cracks. I am now much more careful about this, and have developed construction techniques that help avoid it for the most part, but I still see the occasional small separation and I always point this out in the description of the bowl.
The largest separation that occurs in any of my bowls now is less than the thickness of a piece of veneer, and depending on the placement of the separation and the coloration of the wood around it, it may in fact LOOK like a piece of veneer. Look at the orientation pic of bowl #N013 for example. Many of my fellow craftsmen will be aghast that I allow such flaws in my work. To that I can only repeat what I once heard. "Perfection is the enemy of the good".
SEVERE EXAMPLE OF STRESS SEPARATIONS
What you see below is an egregious example of how in my early days I blithely ignored cross-grain considerations and created a couple of bowls that ... well, just look at the pics:
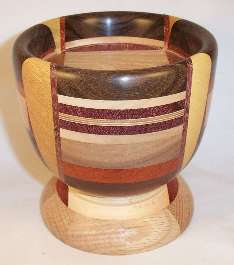
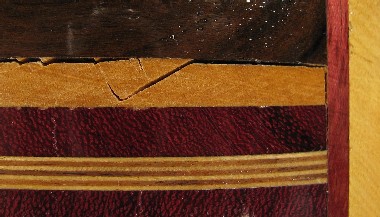
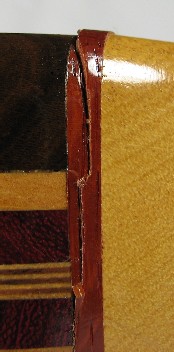
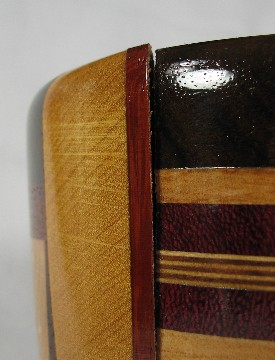
the first pic shows the bowl fresh off the lathe 4 years ago --- the surface was as smooth as glass. The other pics show it today. Even though I applied several coats of polyurethane not long after it came off the lathe, moisture still enters and leaves the wood in small amounts and because of the grain alignments the movement in service has caused large separations and cracks that are VERY visible. The one in the last two pics (two views of the same thing) has moved a section of very hard sharp purpleheart edge out away from the surface of the bowl so much that you could literally cut yourself while handling the bowl.
The separations sometimes occur, and it is certainly the case in this bowl, NOT on the woods that do the most expansion/contraction but rather on the woods glued next to them. In the 3rd pic above, the long vertical split in the red wood happened because the glue joints on the left and right are stronger than the wood and the wood was under sever stress due to expansion of the oak center behind it.
I show this example both to demonstrate what I have described above and also as cautionary tale for my fellow craftsmen. This is NOT a problem that will occur with anything like this severity in my current bowls, and if it did, they would go in the fire pit. I keep this one around as a cautionary tale to MYSELF !